 Jeder Schritt beim Bauen ist zwar interessant, aber nicht unbedingt notwendig. Ich habe die Nasenleiste meiner Flügel schon immer von Hand und nach Augenmaß geschliffen, und das hat bisher nie Probleme verursacht. Da die CNC-Fräse und der 3D-Drucker wieder funktionieren, das Wetter draußen schlecht ist und Claude.ai gerade nichts zu tun hat, …
Ich habe da eine Idee: Kopiere das vorhandene Profil auf ein Blatt Papier, fotografiere es, extrahiere die relevanten Linien und fertige daraus einen Schleifblock an, der dem Profil entspricht – schon hast du die perfekte Nasenleiste!
So viel zur Theorie – tatsächlich habe ich zu diesem Zeitpunkt bereits eine ordentliche Bellanca.dat-Datei erstellt. Ich werde versuchen, die einzelnen Schritte irgendwo zu dokumentieren, damit ich sie beim nächsten Mal wiederholen kann.
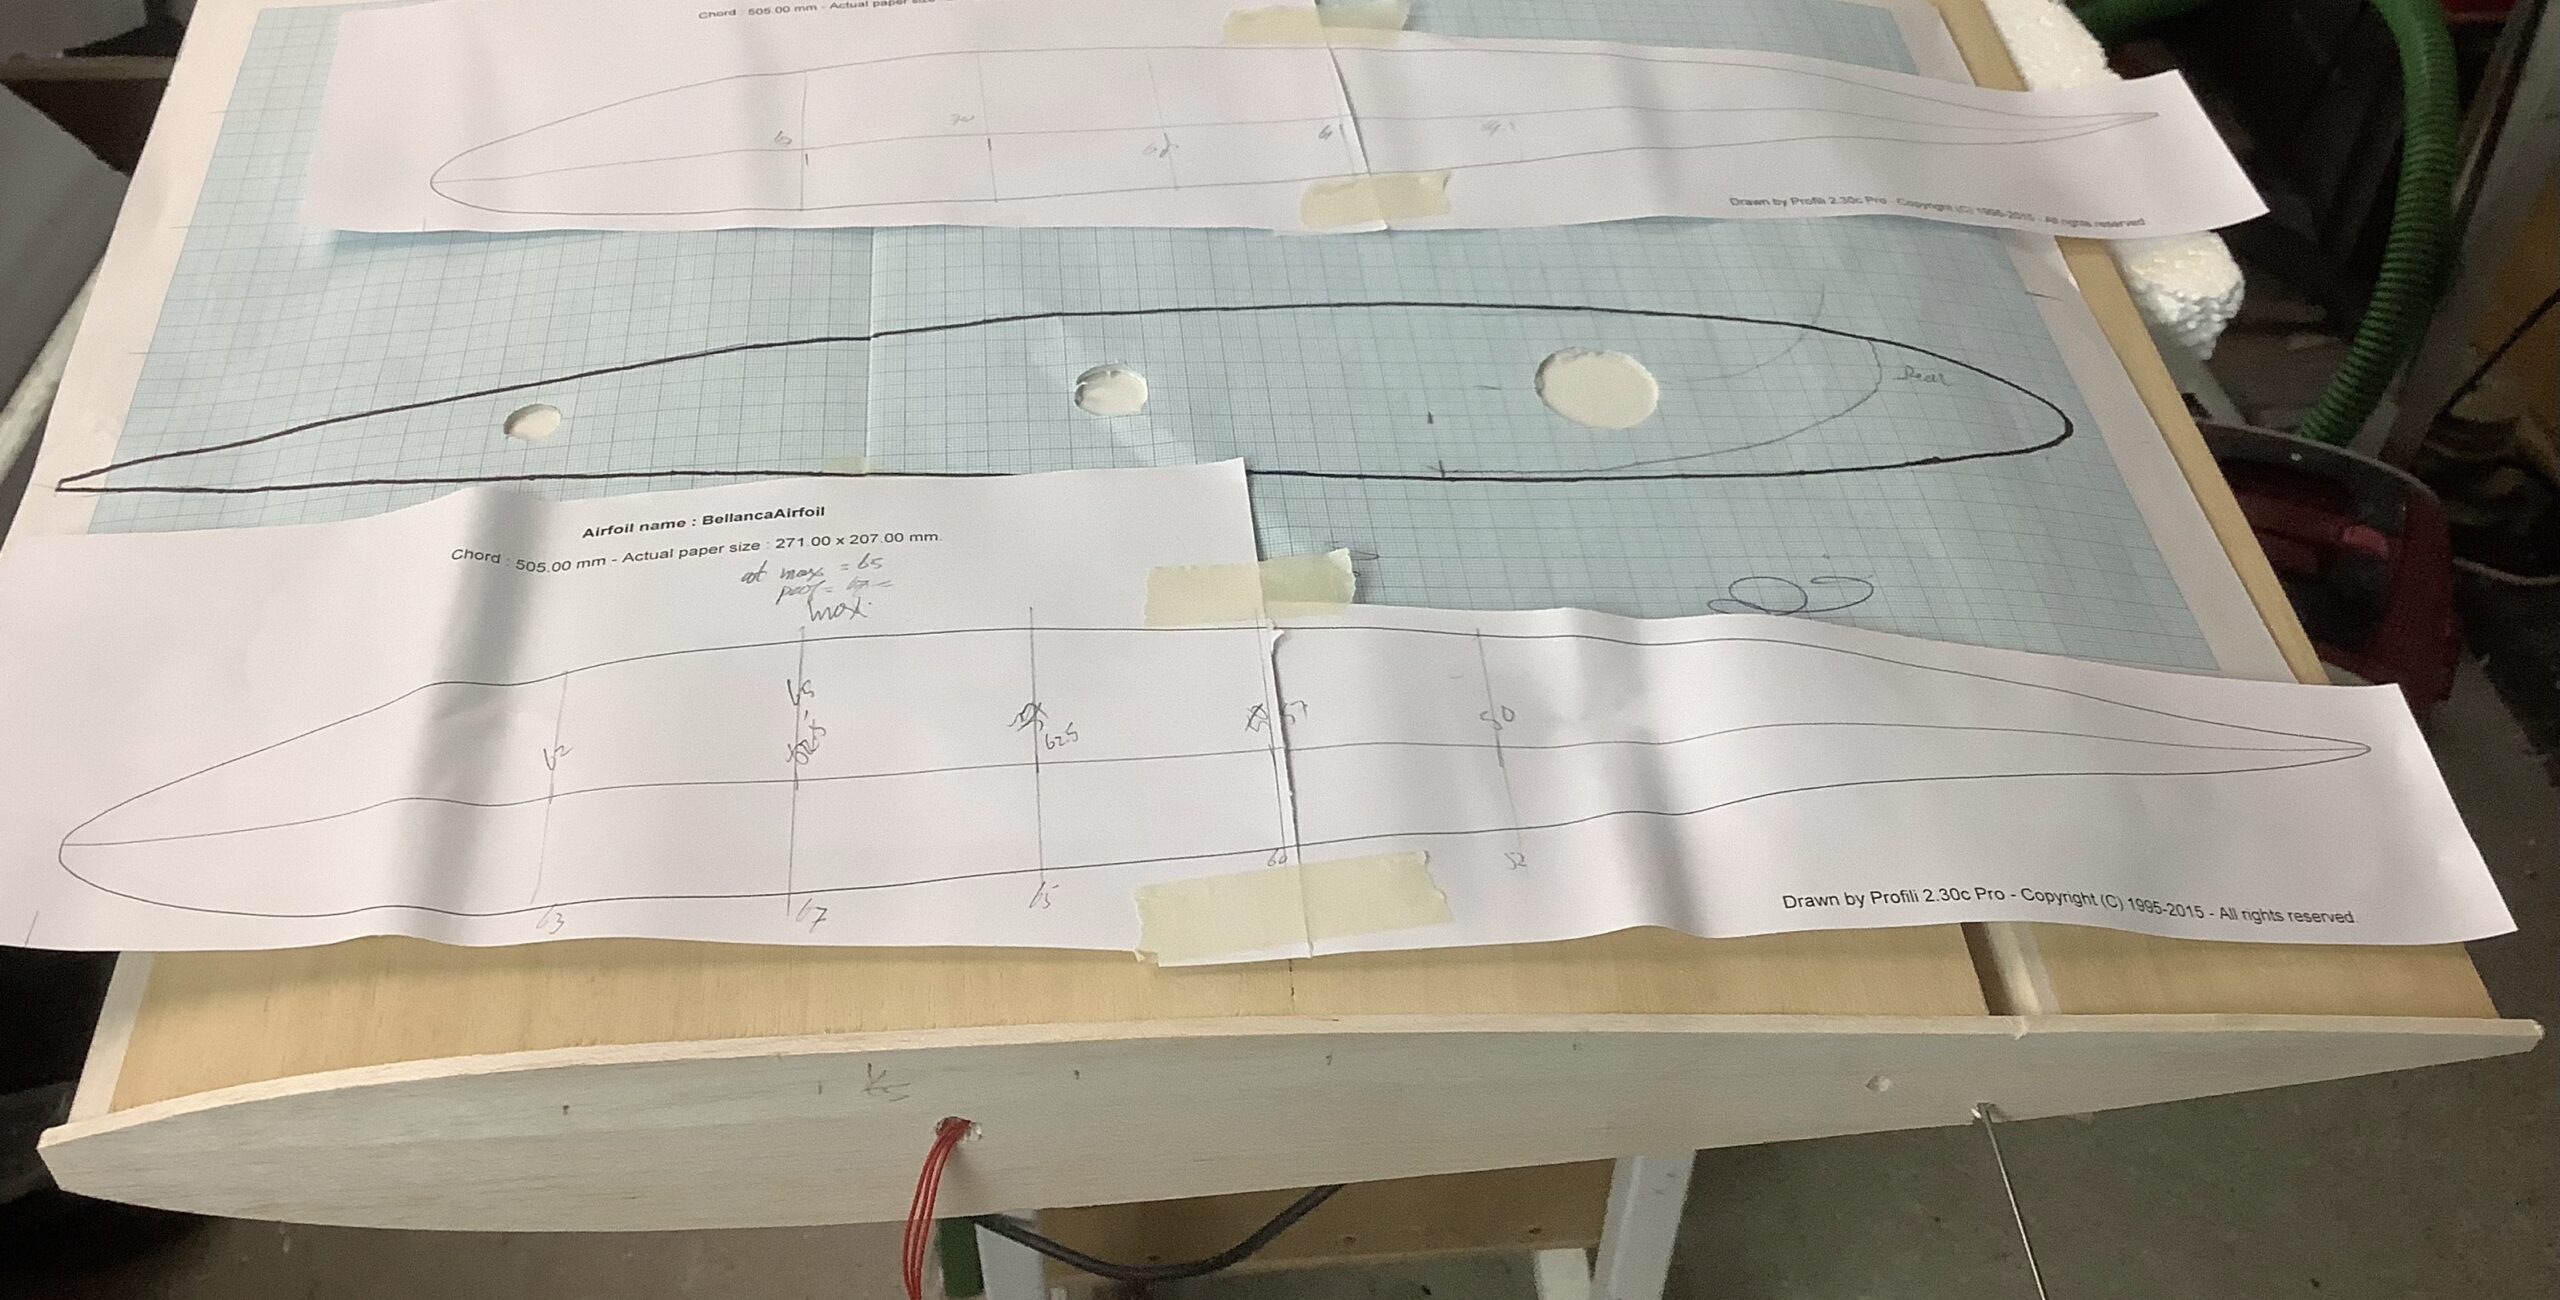
Zuerst zeichnest du die Flügelwurzel auf Millimeterpapier. Du kannst zunächst mit Bleistift zeichnen und dann mit einem schwarzen Stift nachziehen. Die Software kann die Kurve besser erkennen, wenn sie gut definiert ist. Ich habe hauptsächlich GIMP benutzt.

Später wollte ich Profili und DevCad verwenden, um einen Teil der Arbeit zu erledigen. Egal, wie gut das Bild aussieht – Profili erkennt es nicht. Kein Problem, es gibt andere Wege, die Koordinaten des Profils zu erhalten. Hier kommt Claude.ai ins Spiel.
„Hey Claude, ich brauche kurz deine Hilfe. Hier ist ein Bild eines Tragflügels. Ich muss es in eine .dat-Datei konvertieren.“
Ja, das klingt vielleicht einfach, aber ich habe ganze sechs Stunden daran gearbeitet. Der Code ist noch nicht sauber, befindet sich in Arbeit, und da er einmal wie gewünscht funktioniert hat, werde ich ihn vielleicht nie erweitern.
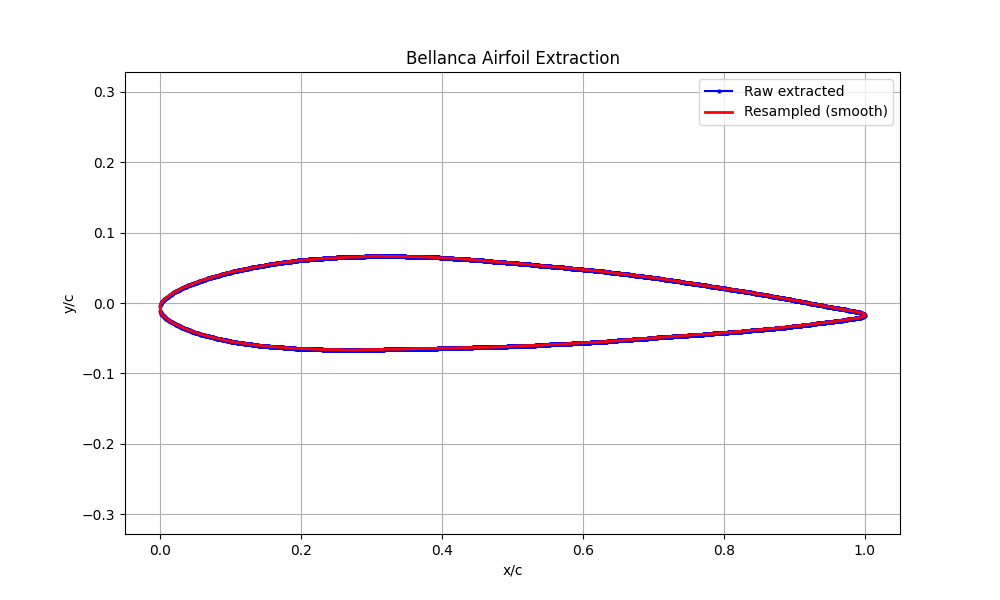
Das ist das Ergebnis der Code-Konturenerkennung. Ich finde, das sieht eigentlich ganz ordentlich aus.
Jetzt, wo ich eine .dat-Datei habe, kann ich mit Profili und XFoil experimentieren. Ich überspringe diesen Teil hier, weil die Ergebnisse genau meinen Erwartungen entsprachen. Das Profil ist nicht perfekt, insbesondere der Nasenbereich, der ja am wichtigsten ist, ist nicht optimal. Das führte zu Sprüngen in den Diagrammen, was bedeutet, dass die Leistung ziemlich schlecht war.
Ich habe also die Grundlagen geschaffen und kann jetzt einige Verfeinerungen vornehmen. Ich starte mit dem Originalbild, das auf Rasterpapier gedruckt ist. Kameras verzerren Bilder, das ist normal, aber es gibt Methoden, dies zu korrigieren. Das ist der nächste Schritt. Das Bild ist verzerrt, deshalb stimmt die Profilstärke nicht – sie ist um 3 % zu klein. Um einen gut definierten und korrekt berechneten Nasenradius zu erhalten, müssen wir auf jeden Fall ein paar Tricks mit der Software anwenden.
In der Zwischenzeit werde ich einige Schablonen ausschneiden und mit der groben Arbeit von Hand beginnen.